
WooCommerce Integration
This guide provides step-by-step instructions for installing and configuring the MIS Pay plugin on your WooCommerce website.
Step 1: Download the MIS Pay Plugin
1- Visit the plugin repository on GitHub:
https://github.com/mispay-bnpl/mispay-woocommerce-plugin.git
2- Click on the Code button and select Download ZIP.
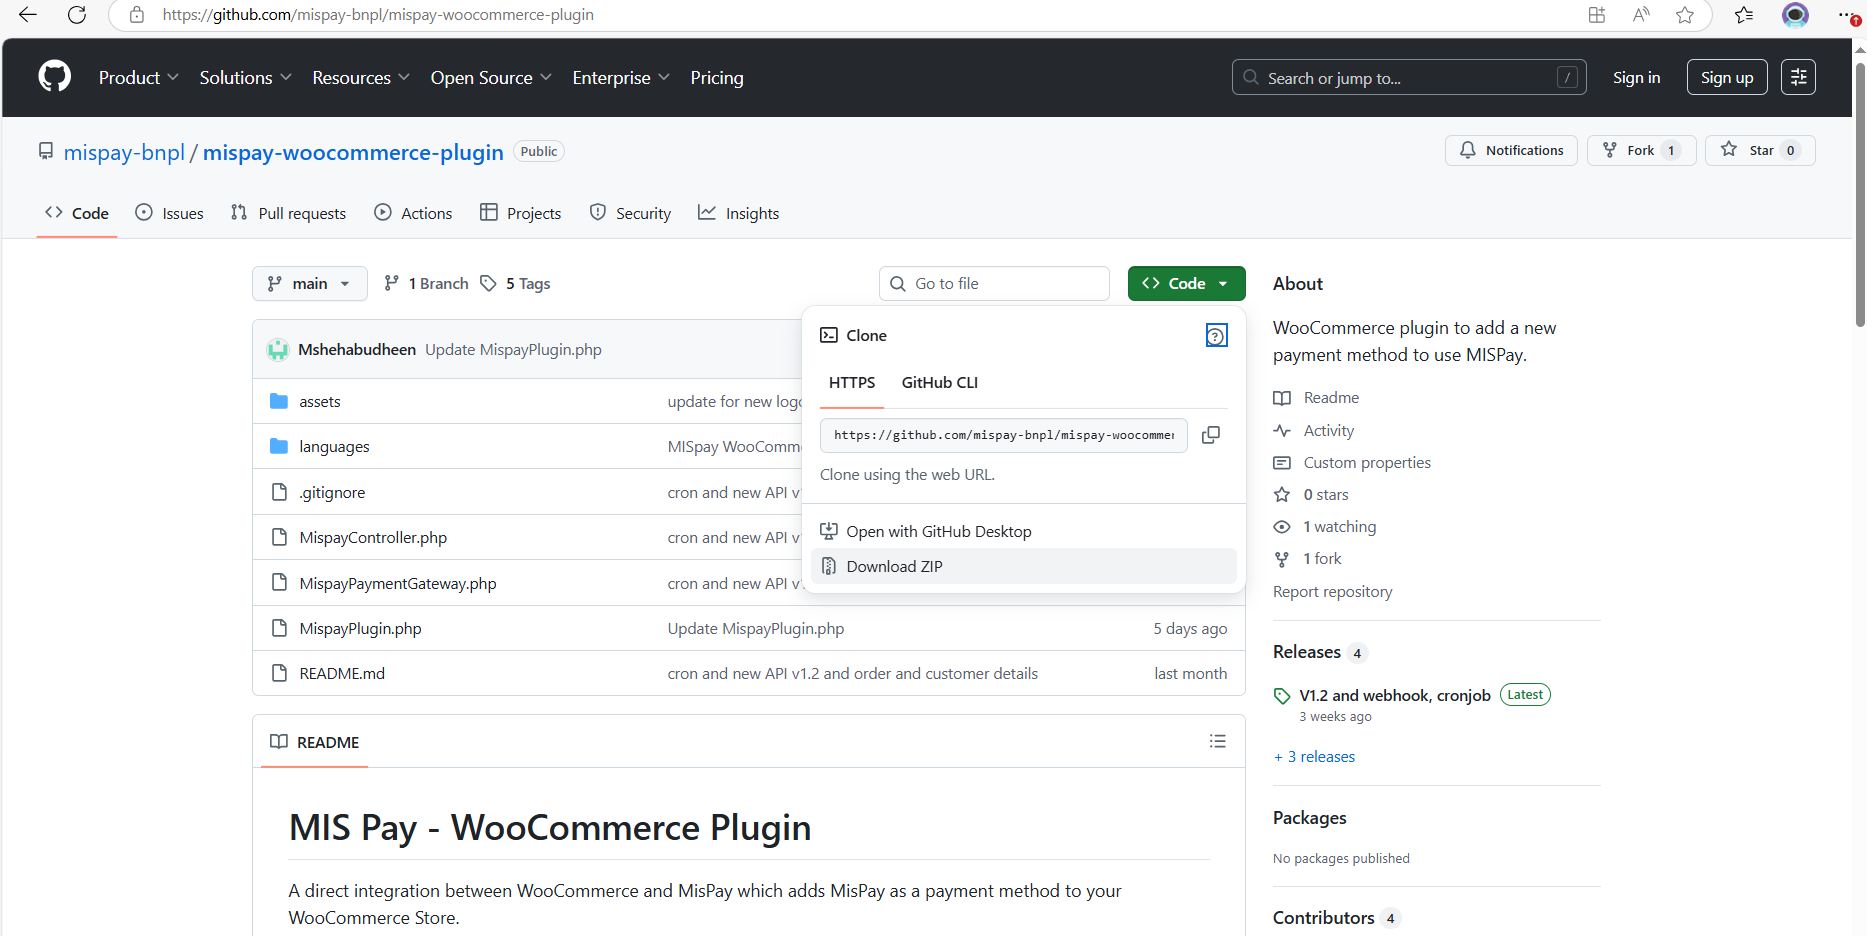
3- Save the ZIP file to your computer.
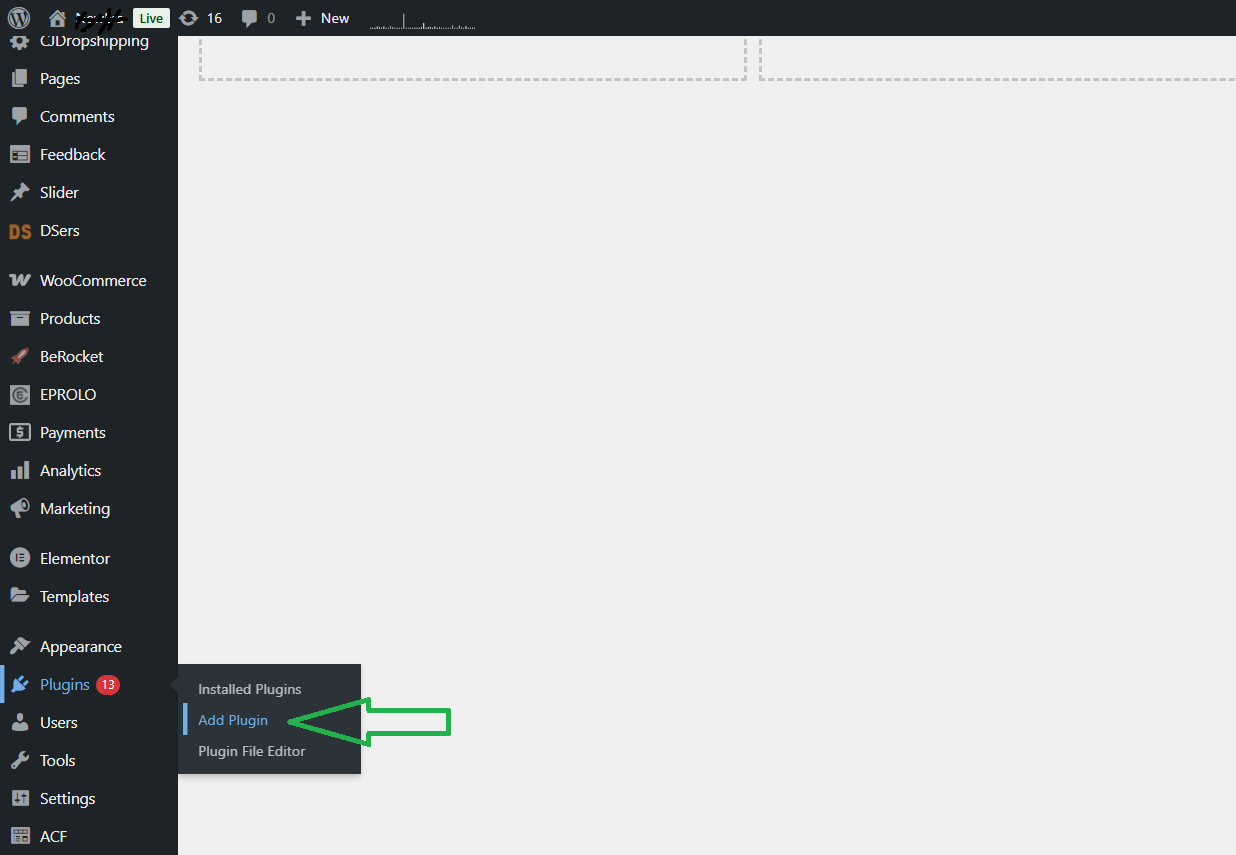
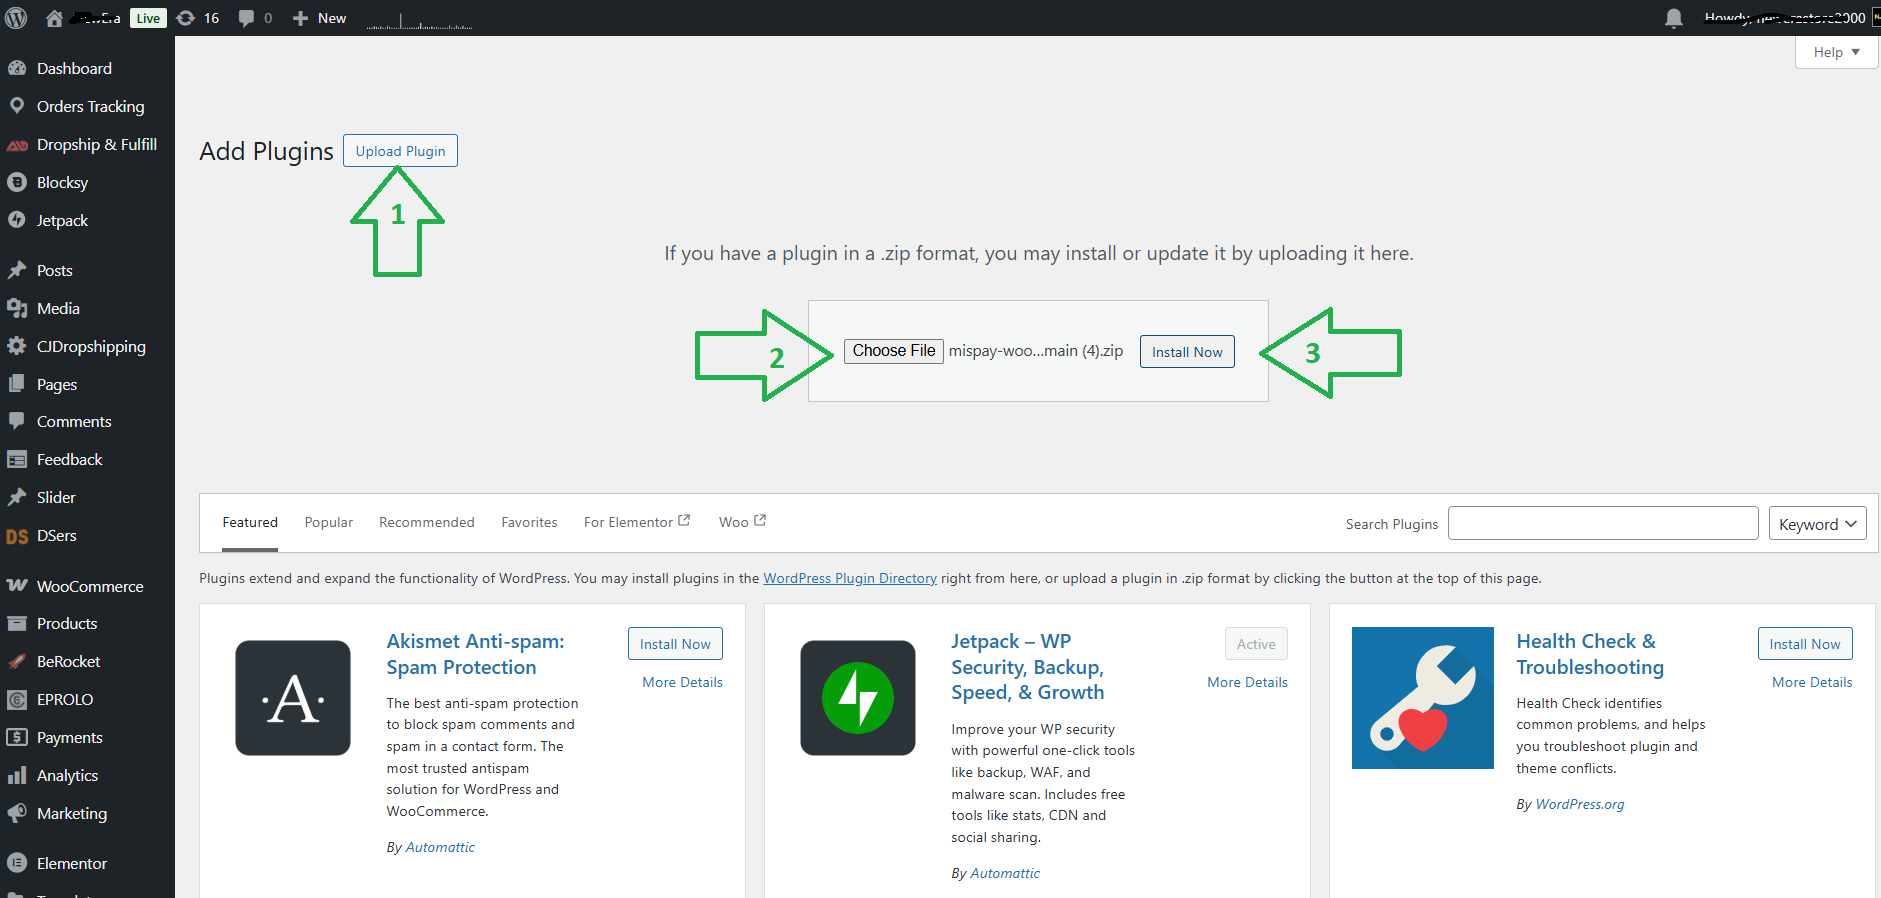
Step 2: Install the Plugin in WordPress
-
Log in to your WordPress admin dashboard.
-
Navigate to **Plugins **> Add Plugin
-
Click on Upload Plugin. Then click Choose File and select the downloaded ZIP file. Then Click Install Now.
-
Once installed, click Activate.
Step 3: Activate and Manage MIS Pay Plugin
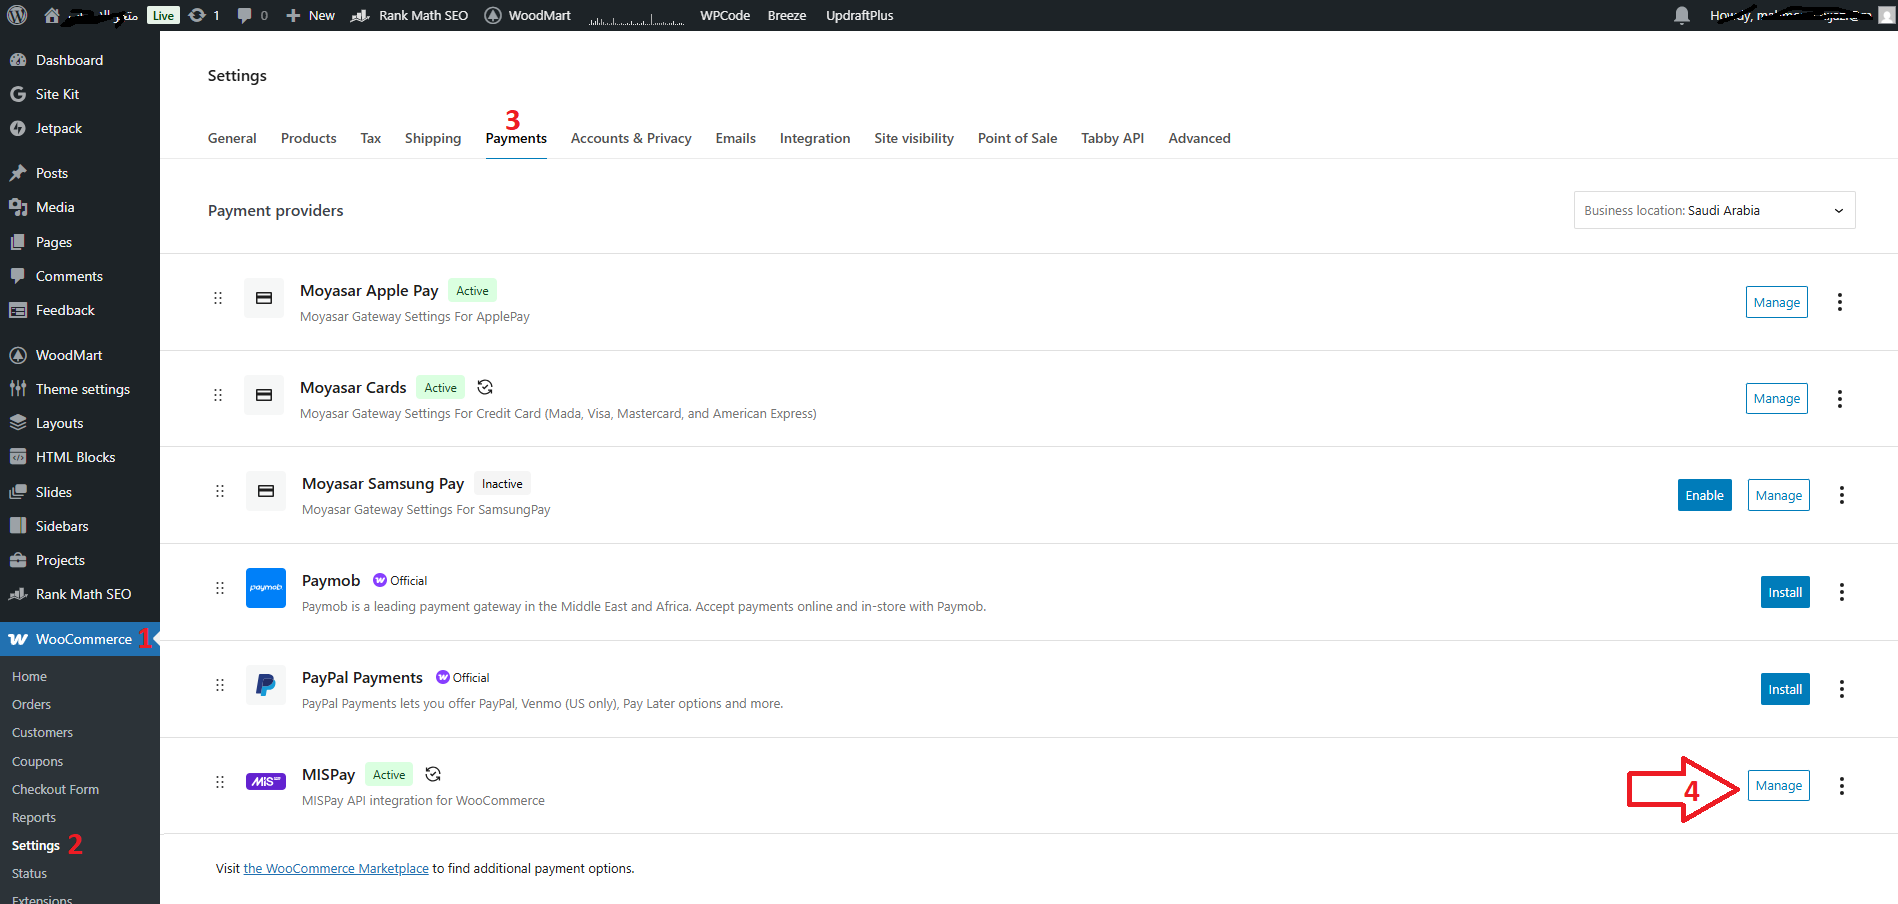
- In the WordPress dashboard, go to WooCommerce >> Settings >> Payments.
- Locate MISPay and click on Manage.
Step 4: Configure API Credentials
- In the MISPay plugin settings, go to the API Credentials section.
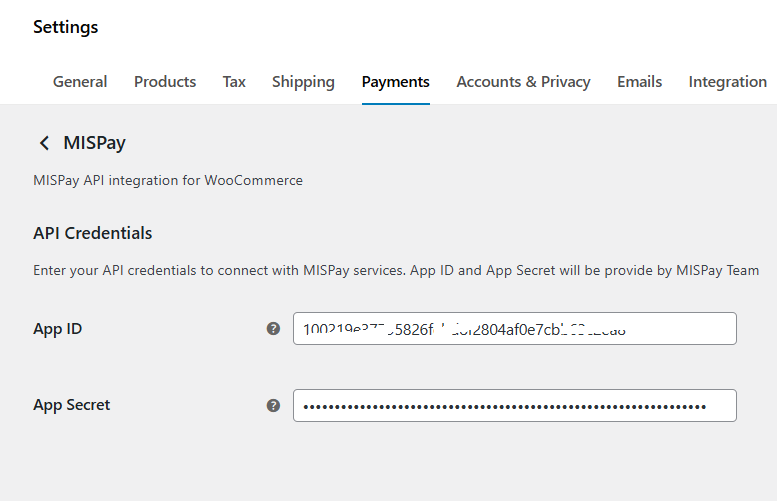
- Enter your App ID and App Secret provided by MIS Pay.
You will receive the API Credential from MISpay team. For testing purposes; you will receive Sandbox credentials firstly. And after finish testing successfully you will receive the Production (Live) credentials.
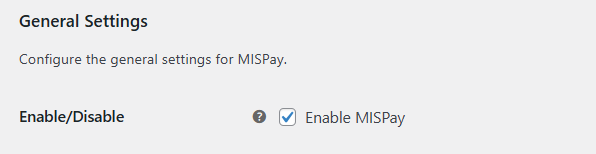
Step 5: Enable MIS Pay Payment Method
-
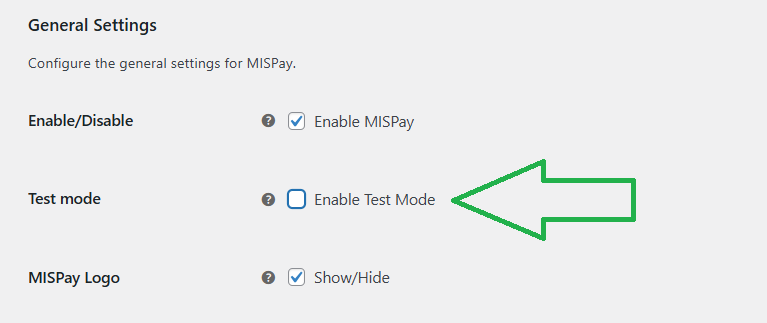
In the plugin settings, scroll down to General Settings, ensure Enable MISPay is checked.
-
Check Enable Test Mode for testing purposes.

- As mentioned before, you need to Enable test mode while you are using Sandbox API Credentials, don’t forget to uncheck this option once your received and enter the Production API credentials.
-
Check MISPay Logo to be showing in your website

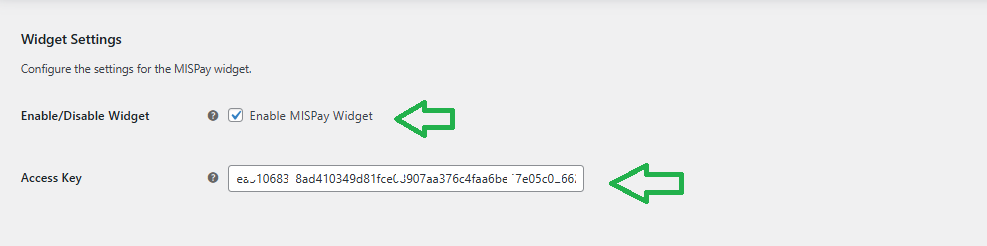
Step 6: Enable MIS Pay Widget
-
Scroll down to Widget Settings.
-
Check Enable MISPay Widget.
-
Enter your Access Key (sent by MISPay Team).
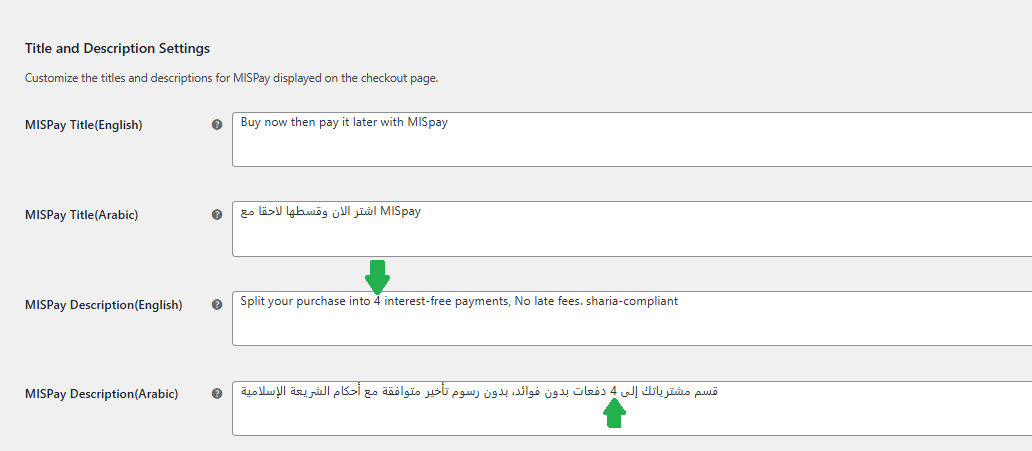
Step 7: Customize Widget and Payment Titles
-
Scrolldown to Title and Description Settings:
-
You only need to Change the number of installments as it agreed in your contract with MISpay
Step 8: Webhook URL & Save Changes:
-
Scroll down and Copy the MISPay Webhook URL from the plugin settings.
-
Send this URL to MIS Pay support team.
-
After completing all configurations, click Save Changes.

TESTING
- Enable Test Mode for testing.

- Place test orders to verify the payment process. Try to attempt all different scenarios, and monitor the order status reflection on Orders on WordPress Admin
Remember to disable (un-check) Test Mode after successful testing to enable live transactions after receiving Production API credentials from MISpay team.
For further assistance:
Updated 4 months ago